Installing Microk8s using Ansible
The easiest way to install Microk8s is using snap. You will need preferably Ubuntu upwards of 18.04, 4GB of RAM and 20 GB of disk space. Microk8s can be installed as a single node cluster to begin with and nodes can be added eventually. This comes with a few constraints though, which we will discuss later.
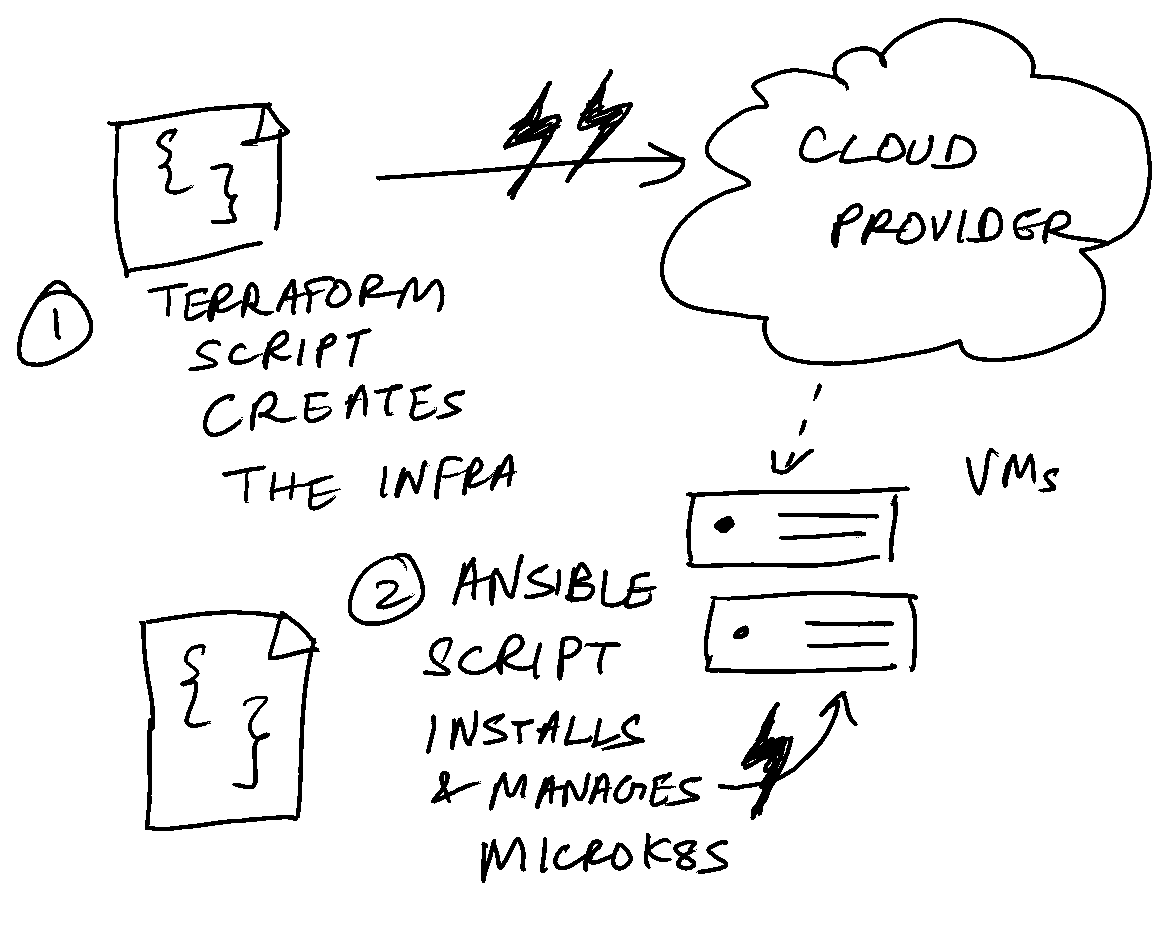
The opinionated “infra-as-code” way to install and manage Microk8s is to use Terraform to spin up VMs, then generate an inventory, and use this inventory and Ansible playbooks to install and manage Microk8s. We will look into this briefly.
The Terraform part of creating the VMs is a topic for another day. Assuming you’ve created the VMs already, let’s jump to the Ansible part. This really involves 3 steps. But before that, let’s install Ansible, assuming you have Python3 installed on your system.
python3 -m pip install --user ansible
First step is the installation of the dependent Ansible role.
This is a requirements.yml file with the following contents.
- src: https://github.com/istvano/ansible_role_microk8s
It can be installed using the following command:
ansible-galaxy install -r requirements.yml
Next step is to compose a hosts file. This is the inventory file which will be consumed by Ansible when installing microk8s. NOTE that the filename can be any arbitrary name.
[microk8s_HA]
master ansible_ssh_host=<public ip address of the VM>

[microk8s_WORKERS]

[all:vars]
ansible_ssh_user=root
ansible_ssh_private_key_file=/path/to/your/private/key
microk8s_version=1.23/stable
This is Ansible’s INI format used to specify inventory and inventory specific variables. Final step is the playbook itself.
- hosts: all
  roles:
    - role: 'istvano.microk8s'
      vars:
        microk8s_plugins:
          dns: "1.1.1.1"
          ingress: true
          metrics-server: false
          cert-manager: true
          openebs: true
This playbook tells Ansible to use the istvano.microk8s role(an abstraction for modules in the Ansible world) with the above customised parameters turned on/off. You can find the full list
here.
This is run by executing,
ansible-playbook -i hosts microk8s-playbook.yml
It takes a few minutes to run it and complete successfully. Some problems you might face might be:
- Ansible can’t connect to the host. Check if your IP is publicly accessible. Check if the security group or firewall is blocking SSH, Check if you are using the correct SSH key/path in the
hostsfile. - Unable to install Microk8s. Check if you are running this on a system which supports
snapd.
After a successful installation, ssh into the VM and execute
microk8s kubectl get nodes
NOTE that you can run kubectl commands only from inside the VMs by default. If you want to run them from your laptop, execute microk8s config command in the VM and copy the Kubeconfig YAML output to your laptop and set your $KUBECONFIG to that file.
Let’s use the same Ansible playbook to add new nodes to the cluster. Assuming you’ve already created 3 new VMs, update the hosts file with their public IPs.
[microk8s_HA]
master ansible_ssh_host=<public ip address of the VM>

[microk8s_WORKERS]
node-01 ansible_ssh_host=1.2.3.4
node-02 ansible_ssh_host=1.2.3.5
node-03 ansible_ssh_host=1.2.3.6

[all:vars]
ansible_ssh_user=root
ansible_ssh_private_key_file=/path/to/your/private/key
microk8s_version=1.23/stable
And re-execute the same command.
ansible-playbook -i hosts microk8s-playbook.yml
A quick aside. #
Ansible is idempotent. In plain English, what this means that you can run the same Ansible playbook on the same system again and again with the guarantee that subsequent runs won’t alter the state of the system. For example, if you write a playbook to append the line “hello” to the end of a file, and run this 5 times, you won’t get 5 “hello”s appended to the end of the file, only 1 “hello”. Ansible is smart enough to “figure out” that the user’s intent is to add “hello” to the end of the file if it isn’t already there. This principle can be applied at scale, and thus, changing the state of a system(or adding nodes to a cluster, in our case) is a matter of cranking the hosts file and re-running the playbook to get the cluster to our desired state.
Fun fact: we can even upgrade our Kubernetes clusters to the latest stable version using Ansible, which will be the subject of our next post.