OpenEBS cStor Quickstart
The cStor storage engine is the most feature-rich variant among all the storage engines OpenEBS has to offer. Among other things, it has:
- Synchronous data replication
- Snapshotting of volumes
- Expanding of volumes
- Cloning of volumes
- Thin provisioning
Thin provisioning vs thick provisioning #
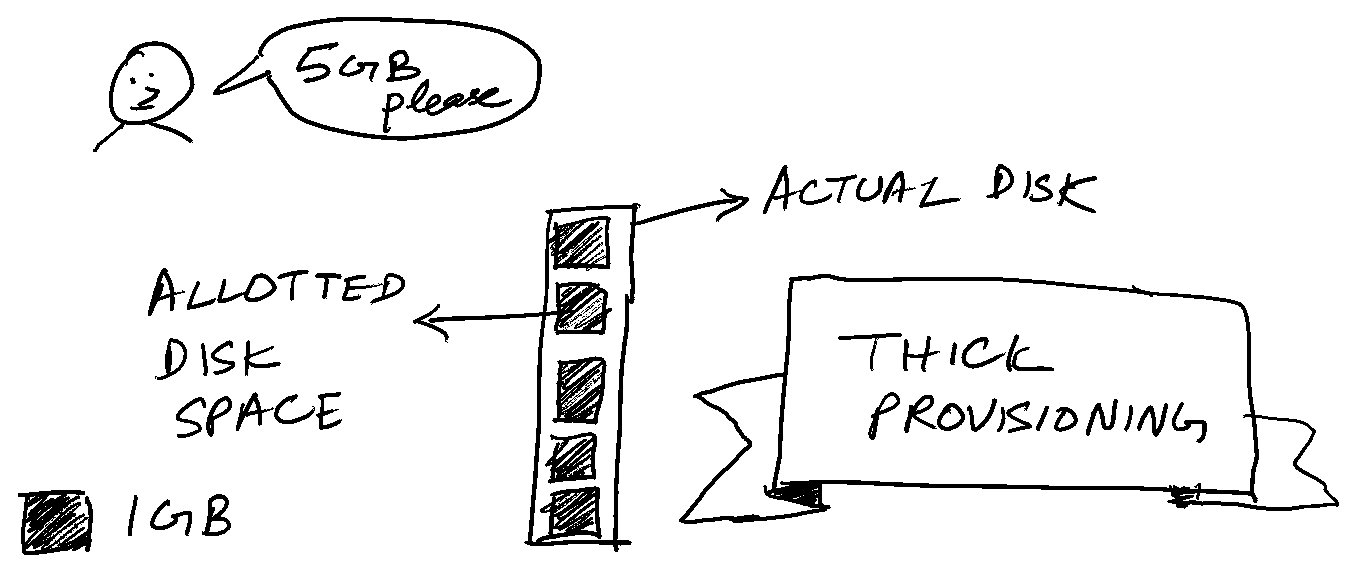
We shall poke into the concept of thin provisioning a bit, as that term was new for me. I’m sure it will be new for many others as well. First, we shall look at what “Thick” provisioning means. When there is a request by a workload to allot 100GB of disk space, the entire 100GB volume is reserved upfront for that workload when the volume is “thick provisioned”. The application might not readily consume the entire 100GB, but still, the entire volume(100 GB) is reserved for the application’s workload.
Thin provisioning allots much lesser disk space than the advertised 100GB. The thin provisioning system abstracts this in such a way that the workload sees 100GB of storage allotted to it.You(the end user) will also notice that the PVC capacity shows up as 100GB. Whereas in reality, this is backed by a much smaller size.
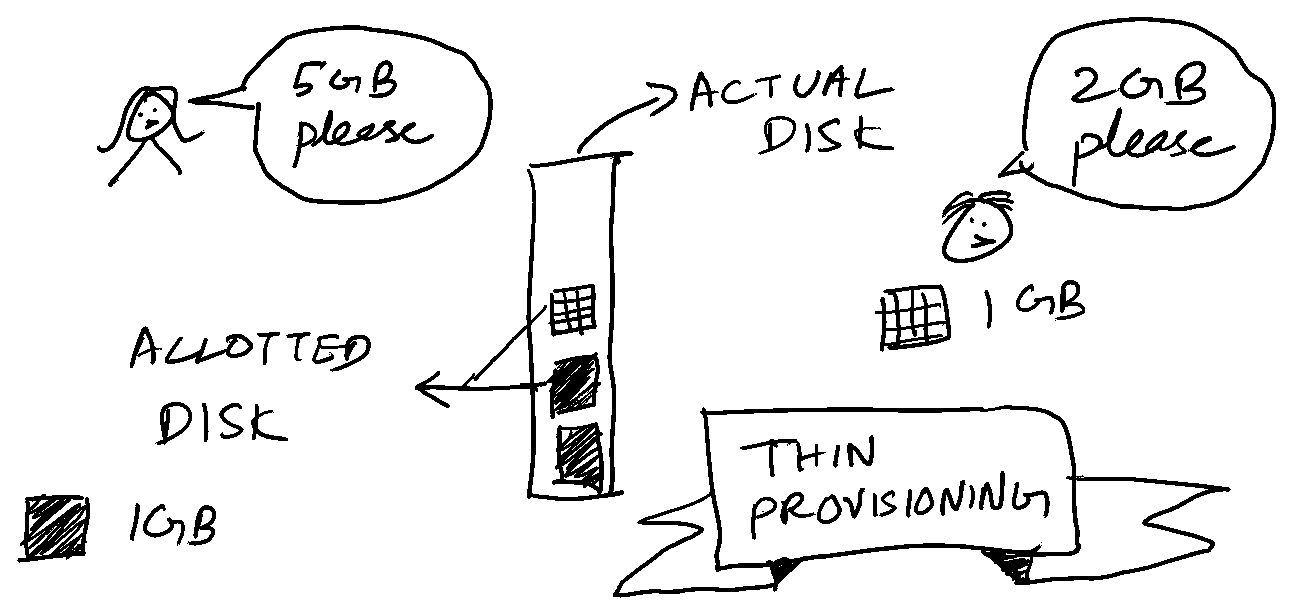
This has some advantages. We can create and consume volumes which are much larger than the actual storage available for us to use. The resource usage is more efficient compared to thick provisioning. Of course, with thin provisioning, there is a risk of over provisioning the disk space. In such cases, the volume will be unavailable for IO once the disk space is exhausted.
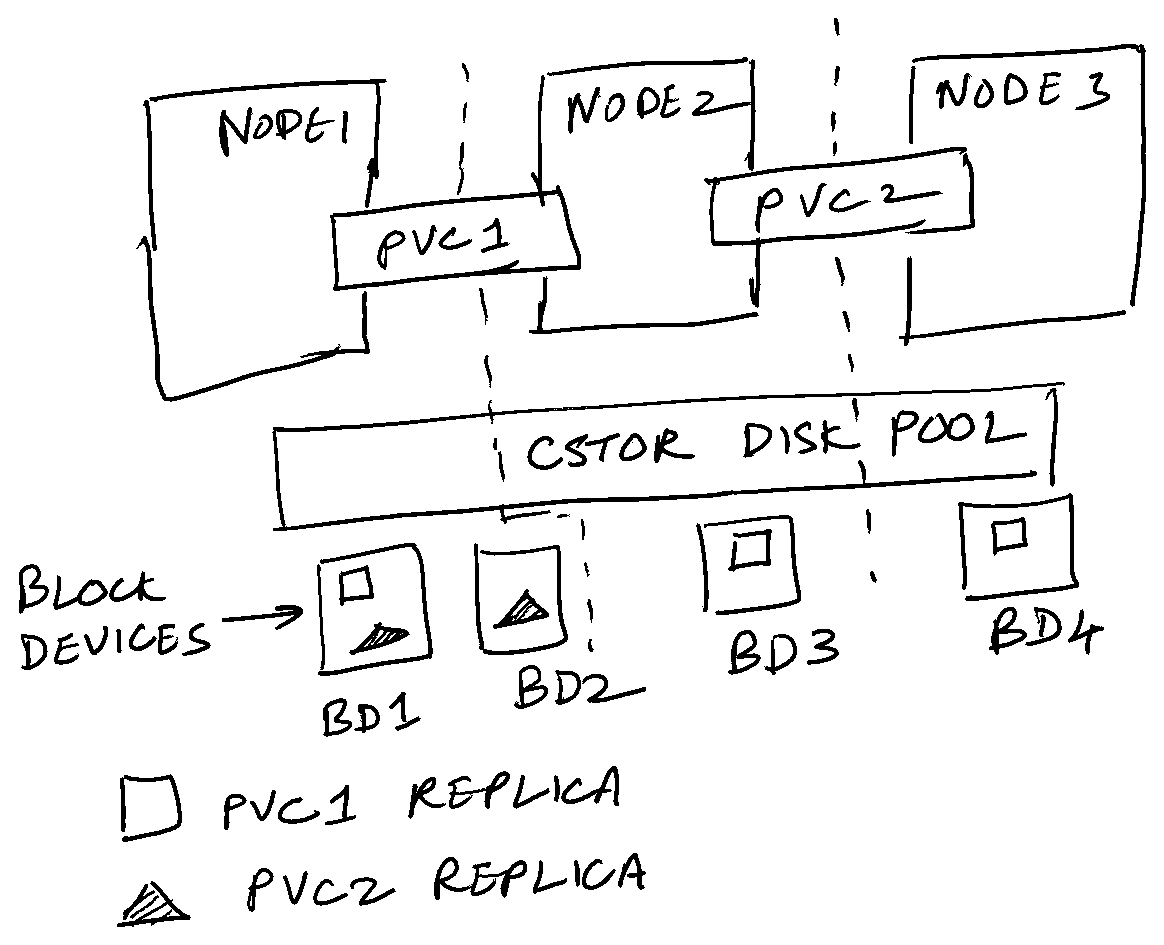
cStor disk pools #
The key element in cStor is a disk pool. This is a single unit which aggregates all the storage available in a Kubernetes node. The disk pool can be resized dynamically without affecting the volumes stored in it. Besides, this allows for thin provisioning of volumes. Different disk pools across the cluster can store replicas across nodes, thus providing resiliency.
The first step in creating a cStor disk pool is to attach volumes to the VMs. I’m using DigitalOcean(affiliate link) to provision the VMs. Here’s a screenshot on how to attach volumes to existing nodes.
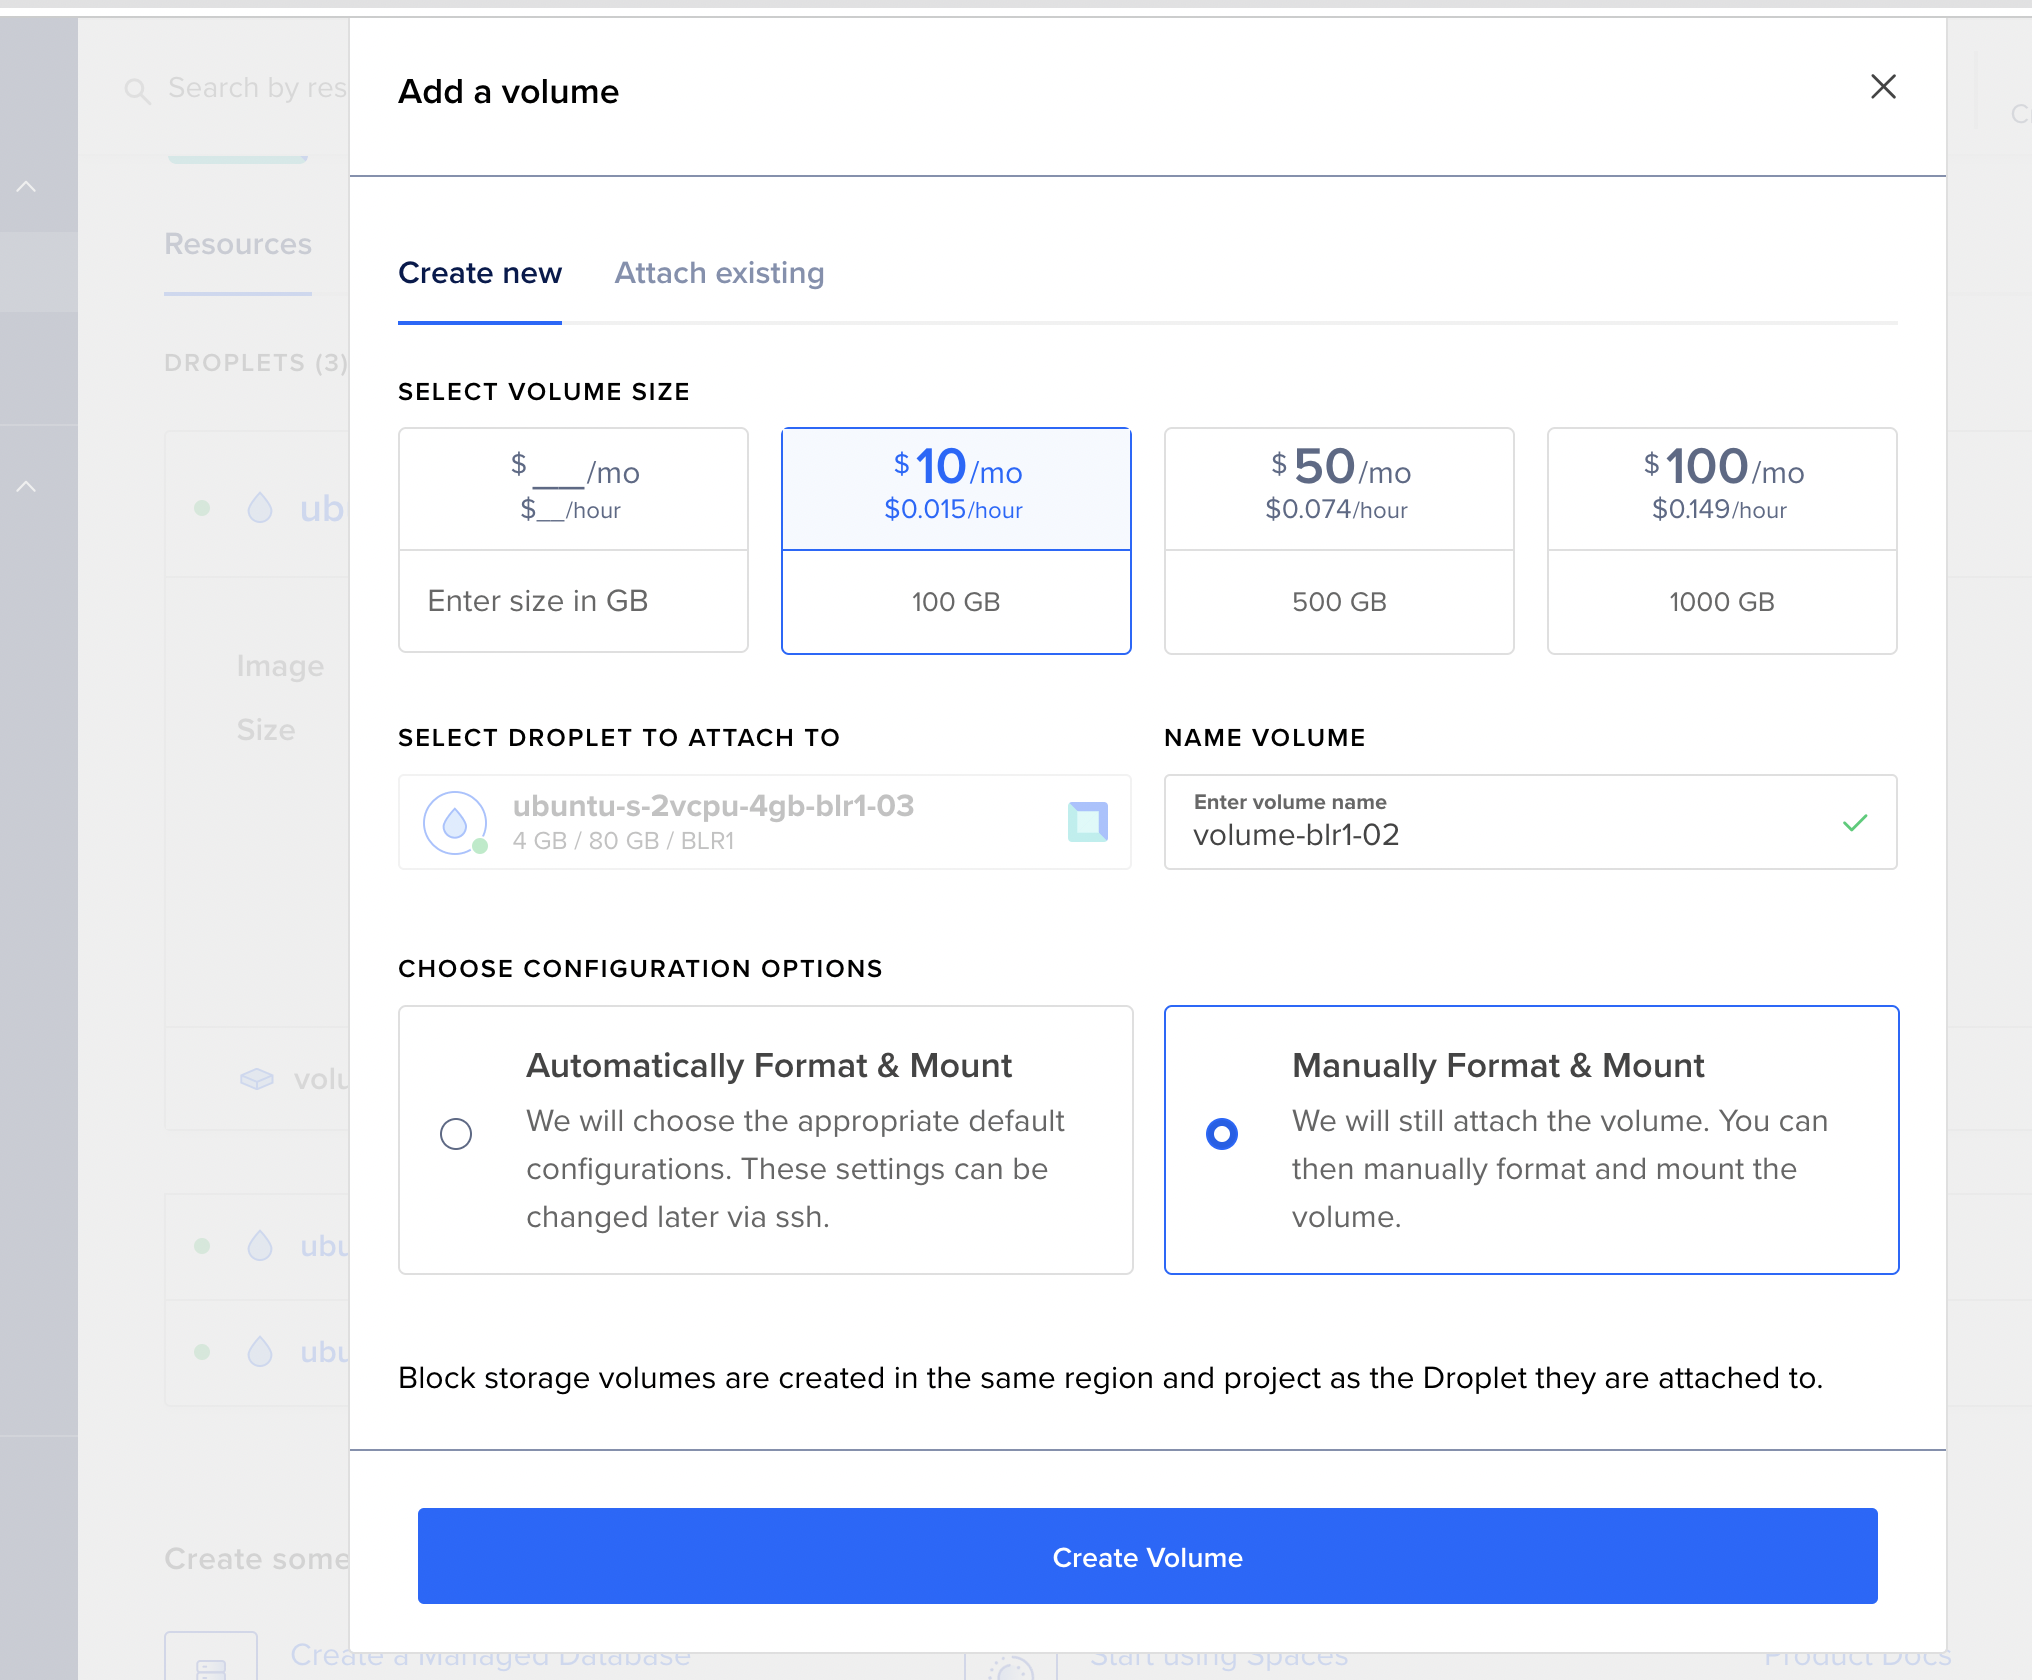
The procedure is the same for other cloud providers too. Hit me an email and I’ll send the procedure for your cloud provider. After the devices are attached to the nodes successfully, you should be able to see them detected by openEBS as the blockdevice resource.
$ kubectl get blockdevices -n openebs
NAME                                           NODENAME                     SIZE           CLAIMSTATE   STATUS   AGE
blockdevice-5491fefaaa1c5b0d9c9c19e16dbed6ae   ubuntu-s-2vcpu-4gb-blr1-01   477184         Unclaimed    Active   29h
blockdevice-42faae9f9e179e7d973fe6a57e7149d3   ubuntu-s-2vcpu-4gb-blr1-02   477184         Unclaimed    Active   28h
blockdevice-e6beacbf56a354ede47967a72fc83dd4   ubuntu-s-2vcpu-4gb-blr1-03   477184         Unclaimed    Active   28h
blockdevice-0326d6fa91af9ad5be18192a8fcb4f92   ubuntu-s-2vcpu-4gb-blr1-01   107373116928   Unclaimed    Active   28h
blockdevice-70709775be142c3566cb44b170ffed71   ubuntu-s-2vcpu-4gb-blr1-02   107373116928   Unclaimed    Active   27h
blockdevice-b83cc099a097cfc9380e9752e50ce020   ubuntu-s-2vcpu-4gb-blr1-03   107373116928   Unclaimed    Active   27h
The last 3 block devices are the new 100GB volumes I’ve attached to each of the 3 nodes. They are still “Unclaimed”. To “claim” them, let’s create a cStor pool out of these devices.
| |
Before we apply this, we have to create the cStor operator in our cluster.
$ helm repo add openebs-cstor https://openebs.github.io/cstor-operators
$ helm repo update
$ helm install openebs-cstor openebs-cstor/cstor -n openebs --set-string csiNode.kubeletDir="/var/snap/microk8s/common/var/lib/kubelet/" --set openebsNDM.enabled=false
NOTE that the last step is optimized for a Microk8s cluster. After this step is completed successfully, we can provision the disk pool.
$ kubectl apply -f cstor-pool.yml -n openebs
After a minute or so, you will have a cStor pool with capacity 100GB.
$ kubectl get cstorpoolcluster -n openebs
NAME              HEALTHYINSTANCES   PROVISIONEDINSTANCES   DESIREDINSTANCES   AGE
cstor-disk-pool   3                  5                      3                  102s

$ kubectl get cspi -n openebs
NAME                   HOSTNAME                     FREE     CAPACITY    READONLY   PROVISIONEDREPLICAS   HEALTHYREPLICAS   STATUS   AGE
cstor-disk-pool-zvsc   ubuntu-s-2vcpu-4gb-blr1-02   0        0           false      0                     0                          73s
cstor-disk-pool-m9qn   ubuntu-s-2vcpu-4gb-blr1-03   0        0           false      0                     0                          73s
cstor-disk-pool-qxll   ubuntu-s-2vcpu-4gb-blr1-03   96400M   96400230k   false      0                     0                 ONLINE   73s
cstor-disk-pool-tvmj   ubuntu-s-2vcpu-4gb-blr1-01   96400M   96400230k   false      0                     0                 ONLINE   74s
cstor-disk-pool-v7wj   ubuntu-s-2vcpu-4gb-blr1-02   96400M   96400056k   false      0                     0                 ONLINE   73s

$ kubectl get blockdevices -n openebs
NAME                                           NODENAME                     SIZE           CLAIMSTATE   STATUS   AGE
blockdevice-5491fefaaa1c5b0d9c9c19e16dbed6ae   ubuntu-s-2vcpu-4gb-blr1-01   477184         Unclaimed    Active   29h
blockdevice-42faae9f9e179e7d973fe6a57e7149d3   ubuntu-s-2vcpu-4gb-blr1-02   477184         Unclaimed    Active   28h
blockdevice-e6beacbf56a354ede47967a72fc83dd4   ubuntu-s-2vcpu-4gb-blr1-03   477184         Unclaimed    Active   28h
blockdevice-0326d6fa91af9ad5be18192a8fcb4f92   ubuntu-s-2vcpu-4gb-blr1-01   107373116928   Claimed      Active   28h
blockdevice-70709775be142c3566cb44b170ffed71   ubuntu-s-2vcpu-4gb-blr1-02   107373116928   Claimed      Active   28h
blockdevice-b83cc099a097cfc9380e9752e50ce020   ubuntu-s-2vcpu-4gb-blr1-03   107373116928   Claimed      Active   28h
But hey! Why only 100GB? Shouldn’t it be 300GB? This is because we have to factor in replication. If I’m having a storage need of n GB, and a replication factor of R(usually 3), then I need to have storage capacity of R x n GB. Thus, 100GB of capacity from 300GB of disk space spread across 3 nodes with a replication factor of 3.
We will see how to utilise this disk pool in the next post, and more Kubernetes volumes magic like volume snapshots, volume capacity expansion and cloning of volumes.